Final Blog: Analysis on Address metadata

Evening and welcome to our final blog posting during this course. Throughout the course we’ve learned various methods in which to analyze data via code, and specifically Python and applicable libraries. As you read through this post you’ll notice a couple functions, multiple variables, and a statistical method of multivariate analysis to come to a final conclusion on the hypothesis.

Objective: Conclude how accurate can manually entered addresses via users and an ERP system compare, based on a popular address validation API according to USPS address standards. Additionally, what are some assumptions can we gather based on address metadata provided by the API.

GOAL: To provide an estimate on the accuracy of a current ERP address information within a specific region.

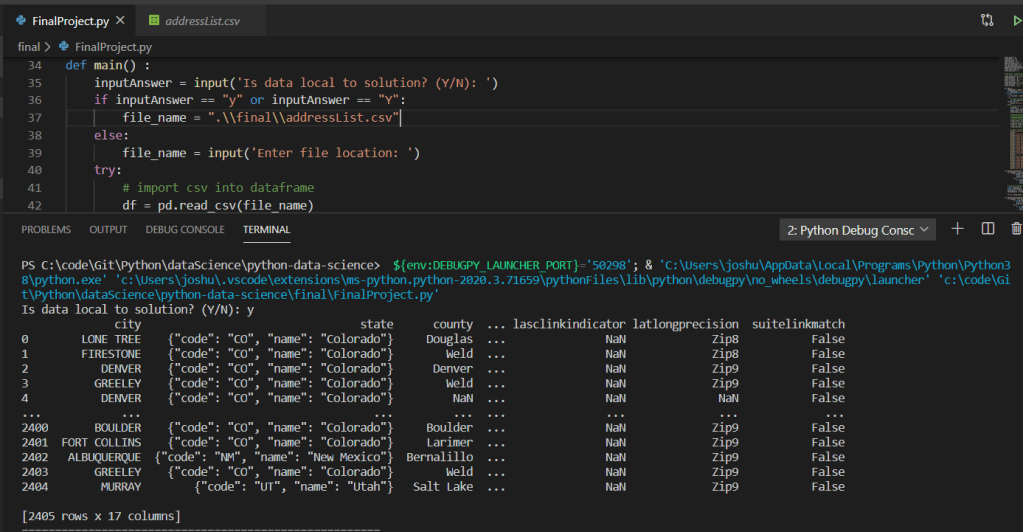
The program utilizes a simple .csv data file read into a dataframe utilizing the Pandas Python library. The data set consisted of approximately 2,400 address records. Below is a screen shot of the records output in the terminal:

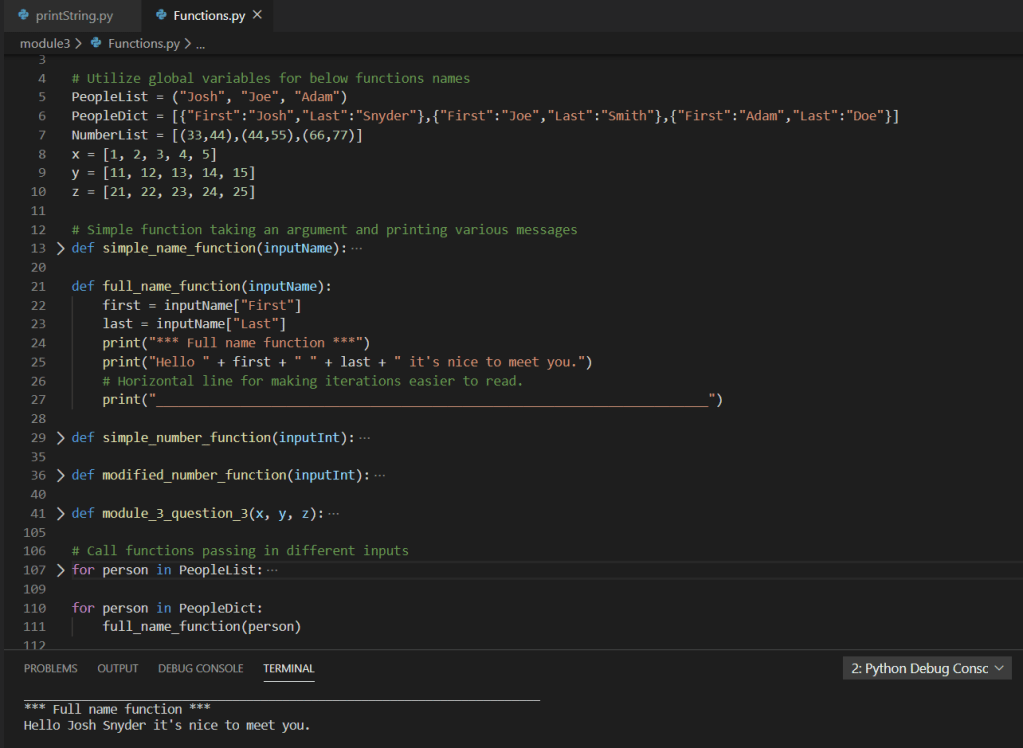
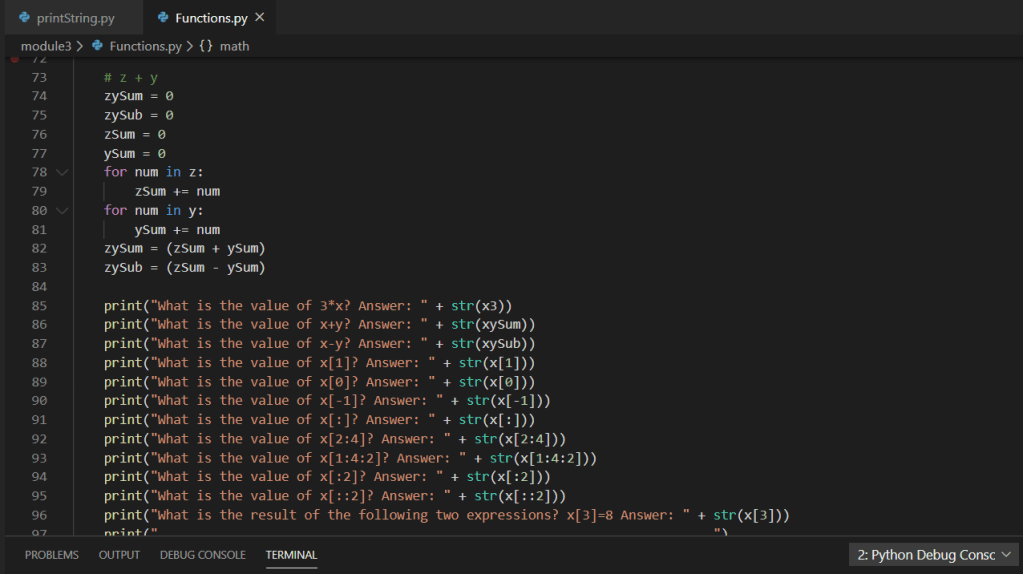
As we continue walking through the program we can see multiple functions accepting parameters and returning tuples utilized within the mainline of the main function:

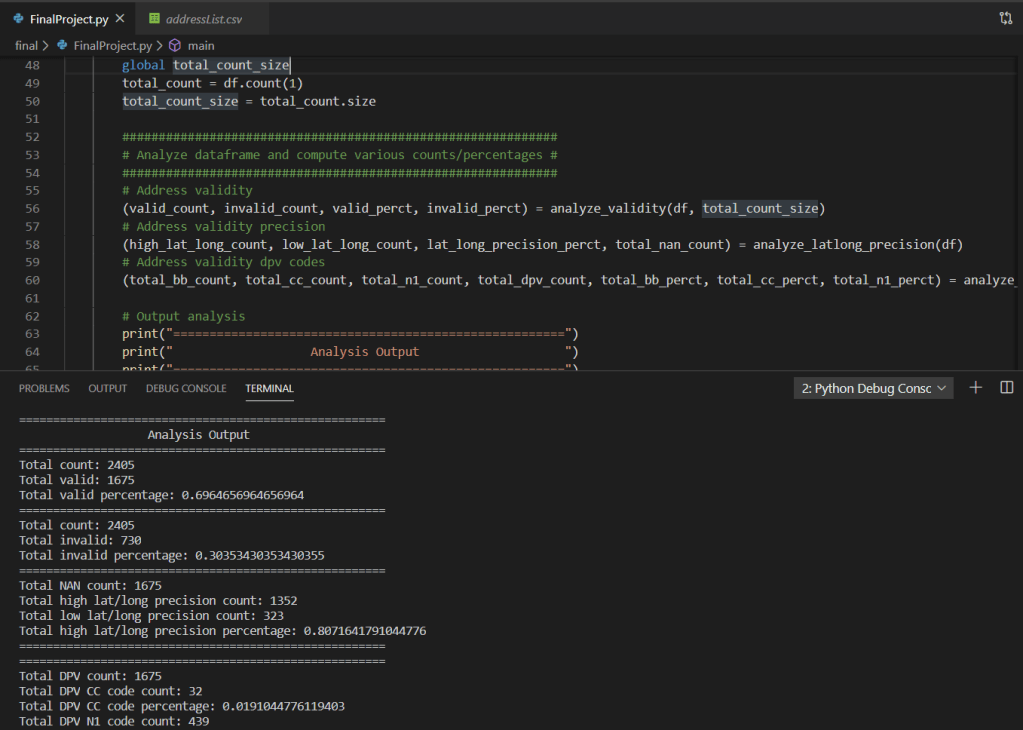
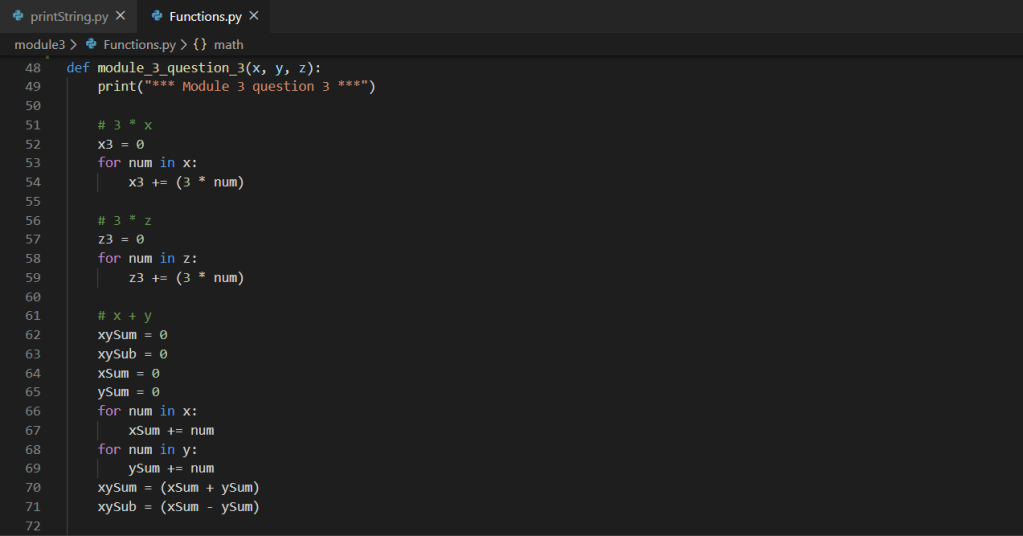
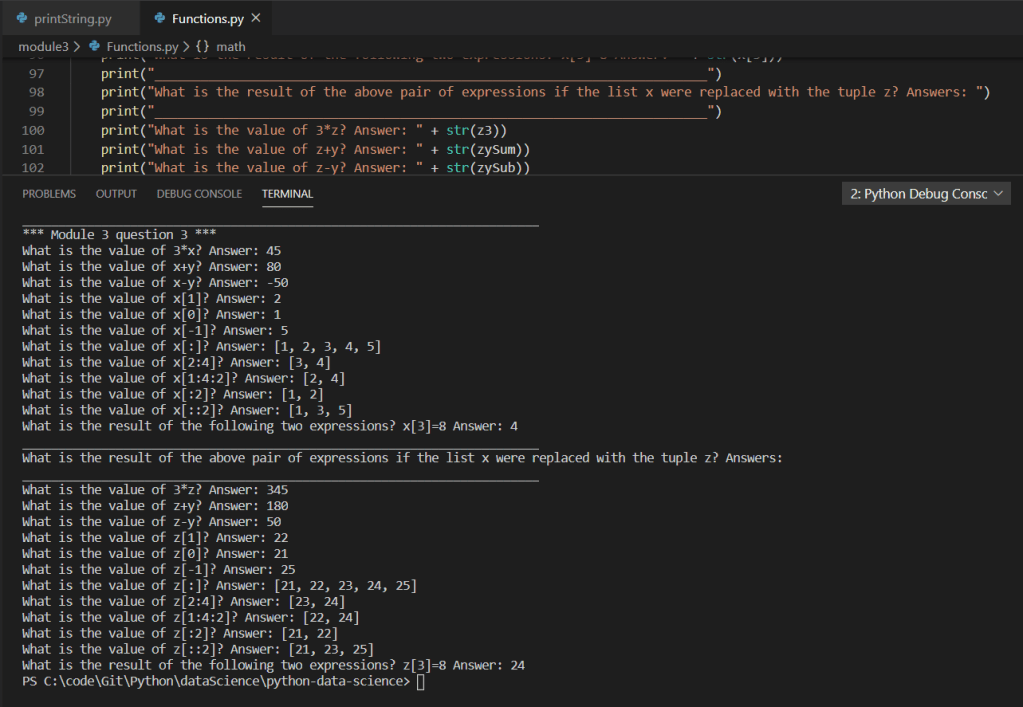
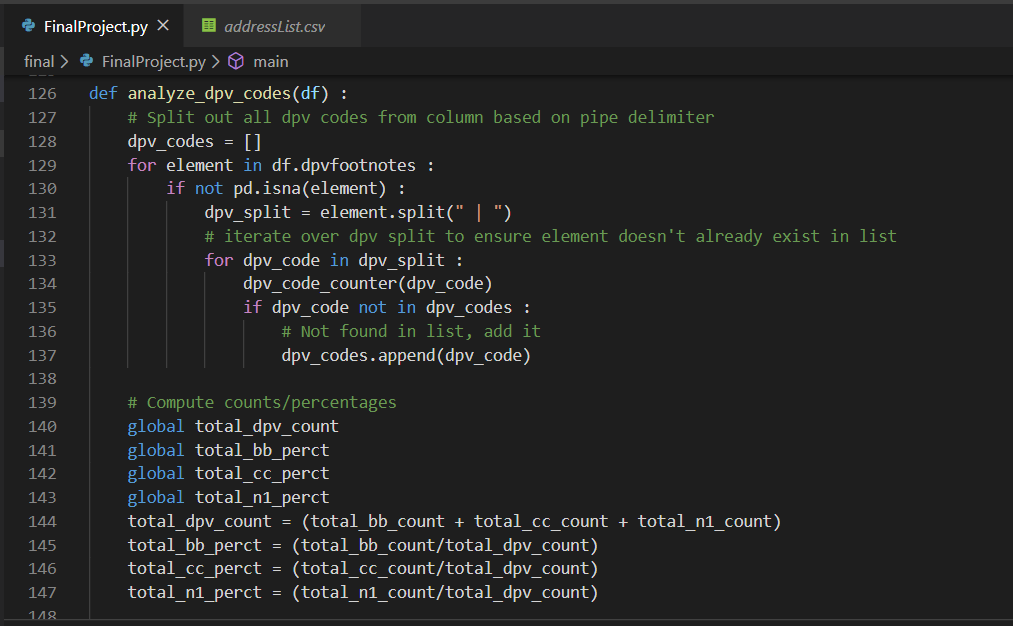
Based on the above screen shot, we can see various analysis output data points from the imported .csv via dataframe. Stepping into a single function for further review, we can see the use of various iterators (for loops), conditional statements (if statements), as well as the additional use of the Pandas extension method for checking NaN on the value of the variable within the iterators. Additionally, we can see the simple arithmetic to compute the total count as well as various percentages.

Furthermore, once multivariate analysis was applied across all percentage variants, the overall accuracy drops to approximately 40% as shown in the below screen shot:


In conclusion, we can say that the accuracy of manually entered addresses via users within a particular organization, for a particular region of the organization, when applied against a popular address validation API according to USPS address standards.

For the full code example and others like it, please feel free to check it out here: https://github.com/joshsnyder/python-data-science/blob/develop/final/FinalProject.py

Comparing Code

Hello and welcome to this weeks blog post! As we’ve learned some basics about Python games and utilizing PyQt5 as a Graphical User Interface (GUI), we’re going to compare two sets of Python game code.

The first set of code derives from Al Sweigart’s Chatper 2 regarding Pygame basics, which can be found here: http://inventwithpython.com/pygame/chapter2.html. The second set of code derives from USF professor Alon Friedman, which can be found here: https://github.com/AlonFriedman01/Python-class-2020/blob/master/Module%20%23%2012.py.

Neither code example actually references each other, meaning they do not implement the same program utilizing different techniques. Instead they are completely different sets of code altogether. For that I found it a little difficult to compare the two code sets side by side. That being said, I have been requested to evaluate the use if Python module Pickle, which is utilized in Professor Friedman’s code example.

The Pickle Python module is purposed as a serializing and deserializing binary data into objects within the program. The term pickling is when a binary stream is deserialzed into a Python object. And unpickling is then a Python object is serialized into a binary stream.

While the need for serializing and deserializing binary data to and from Python objects to and from binary streams does exist. Per the Python organizations website referring to the Pickle module, they state it is not secure and could open your application for easy malicious attacks. While there is a possible hashing protocol you leverage in addition to the Pickle module. Python’s site suggests a more suitable serializing and deserializing package; namely JSON (JavaScript Object Notation). The main benefit in this approach is JSON does not allow for malicious code injection via unsecured data packets being unpickled.

For the above reasons I would prefer the implementation of Al Sweigart’s non Pickle module Pygames.

That wraps up this weeks blog posting. Thanks for stopping by and reading. For more information about Python game coding and the PyQt5 library, check out these links:

https://github.com/grantjenks/free-python-games

https://pypi.org/project/PyQt5/

Visualizing Data

Hello and welcome to this weeks blog post. Today we’re going to discuss a little about visualizing data and the important of it. The importance of data is essential to any organization small or large. However, data in itself is simply bits and bytes. Without the proper aggregation of this data turning it into information, it’s virtually useless. One way to turn data into information is visually. Visualizing data into information is an excellent way to empower yourself and users alike to gain knowledge and wisdom based off factual information.

There are a couple of different Python modules you can utilize for visualizing your data. Below are a few simple examples in which they can be used. To be clear, the information portrayed in these charts are arbitrary.

The first example utilizes the matplotlib module and an arbitrary dataset for the last 6 months of silver spot prices in 2019. As you can see the X axis contains the months and Y axis the dollar amount. Additionally, I’ve included the grid and a simple annotation indicating an incredible spike in one month.

The code:

The chart created from the code:

The next module is called ggplot. Unfortunately, I was not able to properly get the chart to display utilizing the ggplot module, and in fact I had to search around on StackOverflow in order to find a hack in order to even get the code to compile after importing the module itself. That being said, since I was not able to get it to work, I simply posted an example from the library documentation.

In short the issue with ggplot revolved around the pandas library. The fixed that worked for me was following the StackOverflow post which included the following steps:

1.) Navigate to the path where you installed python.
2.) Navigate to /site-packages/ggplot and locate the utils.py file and modify the existing block:
From:

date_types = (    pd.tslib.Timestamp,    pd.DatetimeIndex,    pd.Period,    pd.PeriodIndex,    datetime.datetime,    datetime.time)

To:

date_types = (    pd._tslib.Timestamp,    pd.DatetimeIndex,    pd.Period,    pd.PeriodIndex,    datetime.datetime,    datetime.time)

3.) Navigate to /site-packages/ggplot/stats and locate the smoothers.py file and modify the existing line of code
From:
from pandas.lib timestamps import Timestamp
To:
from pandas._libs.tslibs.timestamps import Timestamp

The code taken from the documentation from ggplot:

That wraps up this weeks blog posting. For the example code please feel free to visit on Github: https://github.com/joshsnyder/python-data-science/tree/develop/module10

Unit Tests

Hello and welcome to this weeks blog post. Today we’re going to discuss unit tests, why we unit test, and how to perform simple unit tests leveraging the unittest module library.

Unit Testing is essential in ensuring your code is working as expected. Sure you can run your code during and after development, but unit tests offer more robust ways to ensure your code is working as designed. For example, you are able to define set tests that you can expect to pass during the build/deployment process, a.k.a. CI/CD or continuous integration/continuous deployment. This type of unit testing during the CI/CD process is more in line with enterprise development, but is a great area to get exposure too. For your unit test methods, you want to name them in a way that are meaningful. For example in the below code we have a very simple function that adds 2 + 2 and returns 4.

Therefore, we’ve named our unit test methods as such: testTwoPlusTwoShouldReturnFour and testFourPlusTwoShouldNotReturnFour. When we run our unit tests via the extension in VS Code, we can see the available tests and their success/failure passes.

In addition to running unit tests locally, you can leverage online tools similar to the one shown below. This tool allows you to paste your code in the browser and run it online to debug. Be sure to be cautious when utilizing such online tools, as they could cache or log your code, be sure no sensitive data is passed along, or advanced propitiatory algorithms.

Of course these are simple examples, but it does show you how you can and should think about unit testing your code. For the example code regarding this blog posting, feel free to visit GitHub here: https://github.com/joshsnyder/python-data-science/tree/develop/module9

Shallow, Deep, and Iterators

Hello and welcome to this weeks blog posting. This evening we’re going to discuss three aspects of data manipulation; shallow copy, deep copy, and various iterators utilizing the itertools module.

Shallow copy, is essentially constructing a new object by composition to the extent possible, and then inserts by reference to the object. For example, in the below examples we can see the data set in it’s original state, shallow copied, a child element of one parent properties modified, and lastly the shallow object and original objects printed to the console. Since this function utilizes a shallow copy, thus a reference, the child element was modified in the original data set.

Deep copy, is essentially constructing a new object by composition to the extent possible, and then recursively inserts by coping to the object. For example, in the below examples we can see the data set in it’s original state, deep copied, a child element of one parent properties modified, and lastly the deep object and original objects printed to the console. Since this function utilizes a deep copy, thus a recursive copy, the child element was NOT modified in the original data set.

The next section we’re going to discuss are iterators. Specifically, iterators utilizing the itertools module imported into our program. Below are various examples of iterators; simple implementation using a for loop, an example utilizing a infinite loop with a break after a few iterations, an example utilizing the cycle function within the itertools module, and lastly the repeat function within the itertools module.

Well, that about wraps up this weeks blog post. We discussed shallow copy, deep copy, and various examples of iterators utilizing the itertools module. For full code of these examples please feel free to visit my GitHub page: https://github.com/joshsnyder/python-data-science/tree/develop/module8

DateTime and TimeDelta Modules

Hello and thank you for reading this weeks blog post. Unfortunately, I missed last week, but I’m back at it this week! This evening we’re going to discuss two popular Python modules; DateTime and TimeDelta. There are numerous use cases for utilizing these two modules in every day programming.

DateTime is a simple yet extremely useful. You’re able to utilize the DateTime module by first importing it from the Python utilities. As shown below a few examples of the DateTime module include getting the current date, and utilizing an extension method of the module to parse out the time from the date time object.

TimeDelta is another extension method from the date time object that is extremely useful. When you include the extension method TimeDelta you’re able to retrieve and set various aspects of the date time object itself. For example, the below snippet of code utilizes TimeDelta to extract the date, add various seconds, minutes, days, and years to the date time object, which are then displayed to the console.

For example of the above code please feel free to visit my GitHub page: https://github.com/joshsnyder/python-data-science/tree/develop/module7

Thanks for stopping by this week’s blog!!

Python Modules, Strings, and Functions

Hello and welcome to this weeks blog posting. This evening we’re going to discuss a couple of topics regarding the Python coding language; modules, strings, and functions. Following a brief discussion on these topics, we’ll then look at a couple of examples via code.

Python modules are simply collections of multiple Python functions, variables, and even code; wrapped into a centralized package. Once you have a module defined, you’re able to reference that module internally within your working file by simply executing it, or via importing (if externally available; e.g. CDN, NFS, or even on your local machine within a different directory), and executing it.

Python functions are blocks of code typically designed to perform a single task or operation. Functions are generally utilized by programmers to be reusable code to perform a repeatable action. For example if you had a need to multiply a integer by 2 more than a single time, you may want to consider creating a simple function for this. This applies two important concepts in programming; keeping D.R.Y. and less maintenance intensive coding. D.R.Y. Don’t Repeat Yourself, the practice of ensuring you write code once and reuse it. This goes directly into less intensive maintenance. If you were to have more than a single location within your program that performs the same task or operation, when those blocks of code are being modified, you’ll have to always remember to modify in both places.

Below is a simple program that utilizes multiple functions, in fact these happen to be nested. The program takes an input, converts to an integer, and multiplies the input integer by two.

Python string data types are like any other string data type in programming or databases. They’re simple to understand, can be manipulated into array’s, lists, dictionaries, and tuples to name a few. Additionally, there are quite a few accessor methods that are available from string data types. From concatenation, substringing, length, formatting, getBytes, indexOf, hashCode, etc…

Below is simple program that utilizes string interpolation to accept an input string, modify an existing string, and return the manipulated string to the user.

That wraps up this weeks blog post, for a copy of the above code and other examples in Python, please visit my GitHub page: https://github.com/joshsnyder/python-data-science

Quadratic and Reciprocal Equations

Good evening and welcome to this weeks blog posting. For this evening’s post we’re going to discuss quadratic and reciprocal equations a bit, and how we can apply them within Python for data computation and analysis.

Starting with quadratic equations. What makes an equation quadratic? Simply put, an equation becomes quadratic when one of it’s variables are superseded with an exponent of 2. This converts the equation into a quadratic one, in which we are then able to apply the quadratic formula too.

Quadratic formula:

As we can see in the above formula we’re able to input our coefficients into the quadratic formula to obtain it’s answer.

Now that we know what makes an equation quadratic and what the quadratic formula is, let’s put this knowledge into Python code to solve the following:

Solve: x2-5.86 x+ 8.5408

We first start with utilizing the math module library in Python and input our variables:

From there we following the quadratic formula and obtain our answers. You’ll notice a couple of different math functions utilized from the math library; .pow which obtains the power of an input int or decimal based on the exponent passed in, as well as the .sqrt function, which obtains the square root of an int or decimal passed into it. Additionally, we’re utilizing string interpolation (f’…’) in place of wrapping our int’s and decimals in a str() function for ease of printing to the console:

Moving onto Reciprocal equations. This one is extremely simple, basically when talking about reciprocal equations, all we have to do it flip it upside down! For example, if we have 1/2 the reciprocal is 2/1. Furthermore, we’re able to take reciprocal equations and obtain their decimals. For example, if I have 1/2 it’s reciprocal is 2/1, and it’s decimal equivalent is 0.5!

Now let’s put this input Python for another look. We start by creating a list of tuples to show the original fractional value as well as their decimal values upon computation in Python. Finally, we wrap these within a for loop and iterate over the list printing each value in it’s respected decimal form to the console.


Well, that about wraps it up for this weeks blog posting on quadratic and reciprocal equations. You can find the related code to these examples of quadratic and reciprocal equations on my GitHub page. As a little bonus I’ve also included a few Python programs playing with files and additional functions within the math library.

GitHub page: https://github.com/joshsnyder/python-data-science/tree/develop/module4

Data Structures and Functions

Hello! This evening we’re going to discuss data structures, functions, and how we can utilize them together in Python to manage and manipulate data.

Data structures are various forms of data encapsulated in a structured manner. These are commonly found within; lists, dictionaries, tuples, sets, and arrays. There are several reasons why we might utilize a data structure; lists are commonly used when you may need to order the elements, when you may need to manipulate the elements, or when you need to add/remove from the list of elements, to name a few.

Functions are essentially blocks of code that are executable from within the main expression. There are many benefits to utilizing functions within your code a few of these include; readability, following the DRY (don’t repeat yourself) pattern meaning it is reusable code, and the ability to easily pass and return parameters and arguments between the caller and function being called.

Below are several examples using simple global variables, functions, lists, dictionaries, and tuples.

Example 1 simple_name_function: In this function we are accepting an argument of type person which is simply a string element, of the PeopleList list object defined as a global variable above. We can view the output of the function in the terminal window below as well.

Example 2 full_name_function: In this function we are accepting an argument of type person which is a key/pair object element, of the PeopleDict dictionary object defined as a global variable above. We can view the output of the function in the terminal window below as well.

Example 3 simple_number_function: In this function we are accepting an argument of type numbers which is a tuple object element, of the NumberList tuple object defined as a global variable above. We can view the output of the function in the terminal window below as well.

Example 4 modified_number_function: In this function we are accepting an argument of type numbers which is a tuple object element, of the NumberList tuple object defined as a global variable above. We then add these two numbers together and return them to the caller, where the result is printed. We can view the output of the function in the terminal window below as well.

Example 5 module_3_question_2: In this function we are utilizing one of the many built-in functions supplied by the Python library; POW(). Which is intended to calculate the power of a number(s). While this is intended to return the square root of 16, a better solution would be to utilize the extension method of the math library; math.sqrt(). Both examples are shown below.

Example 6 module_3_question_3:

For a copy of this particular example feel free to see my GitHub repo:

https://github.com/joshsnyder/python-data-science/blob/develop/module3/Functions.py

Print and String Functions

Hello! Today we’re going to talk a little about two very simple functions within the Python language; print and string.

Starting with the print function. In the simplest form the print function allows a developer to output values to the console terminal of the running system. For example, if I were running a simple blah.py script in my local IDE (I happen to use Visual Studio), I could pull up the terminal and have the values output there. Let’s say I have the follow bit on code:

print(‘This is a test’)

The terminal console would output that exact message within the single quotation marks ‘This is a test’, as shown below:

Moving on the the string function. The string function actually is a built in module with various classes, constants, and functions available for use within your programs/scripts. A few examples utilizing various extension functions of the string module include:

  • upper – Converting all characters within a string to uppercase
  • lower – Converting all characters within a string to lowercase
  • title – Converting all first characters within a word to uppercase

For a much more extensive list of available classes, constants, and functions provided by the string module by Python see: https://docs.python.org/2/library/strings.html

Below is a simple example Python script that utilizes both of the aforementioned functions. In the example we can see we’re importing the string module from the Python library and assign an in-memory string variable (aka buffer variable or a runtime variable) a set of static text. We then print this text as it was originally set. Then we utilize various extension functions from the string module to manipulate the original static text into various other forms; uppercase, lowercase, and titled cased.

For a copy of this particular example feel free to see my GitHub repo: https://github.com/joshsnyder/python-data-science/blob/master/module2/printString.py

Design a site like this with WordPress.com
Get started